How to Repair a VHS Tape: What You Can Fix Yourself and When to Get Help

A VHS tape rarely fails at a convenient moment. It snaps halfway through a wedding video, comes out of the player in a crumpled loop, or turns up after years in a storeroom covered in white spots. Before you reach for a screwdriver, it helps to know which problems are safe to tackle at home, which ones are not, and what a wrong move can cost you. This guide walks through each type of damage, a careful DIY approach for the simple cases, and when to hand the tape to someone with the right equipment.
First rule: stop playing a damaged tape
Most tape disasters get worse because someone tries one more time. If a tape squeals, stutters, shows a snowy picture or gets stuck, press stop and eject it, or switch the player off if it won't eject. Do not force the cassette out; a technician can free a trapped tape far more safely than a tug can.
What kind of damage is it?
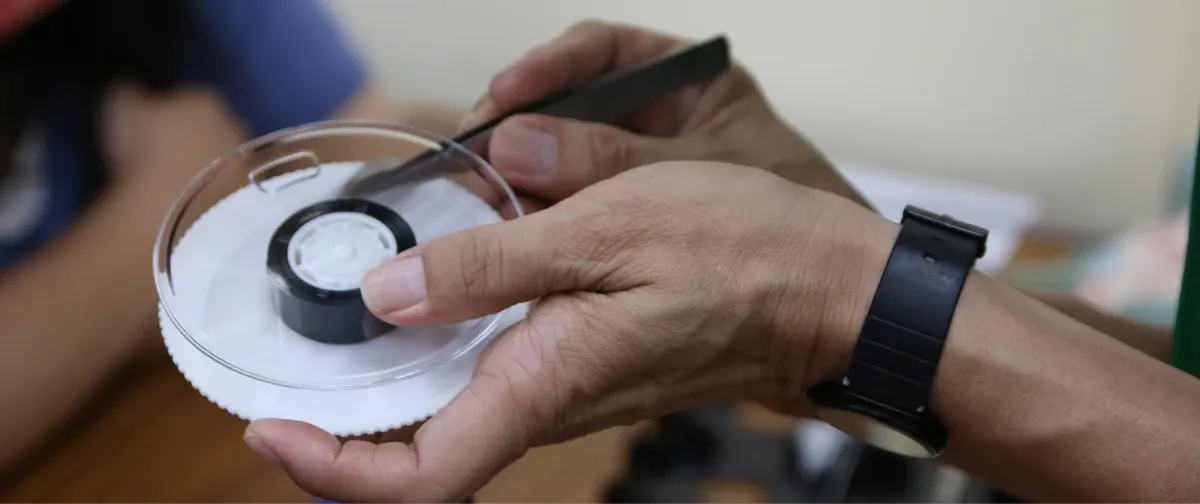
Cracked or broken shell
The plastic case can crack from a fall or turn brittle with age and heat. If the tape inside is intact, this is one of the easier problems: the tape and its two spools can be moved into a sound shell.
Snapped tape
The tape has broken into two ends. It can be joined with a splice, losing a moment of footage at the join.
Creased or crumpled tape
Usually caused by a player eating the tape. Small creases often still play with some picture break-up; badly crumpled sections may be lost. Smoothing a crease by hand rarely helps and can stretch the tape.
Detached leader
The clear plastic section at each end attaches the magnetic tape to the spool. If it comes away, the tape can't wind properly.
Mould
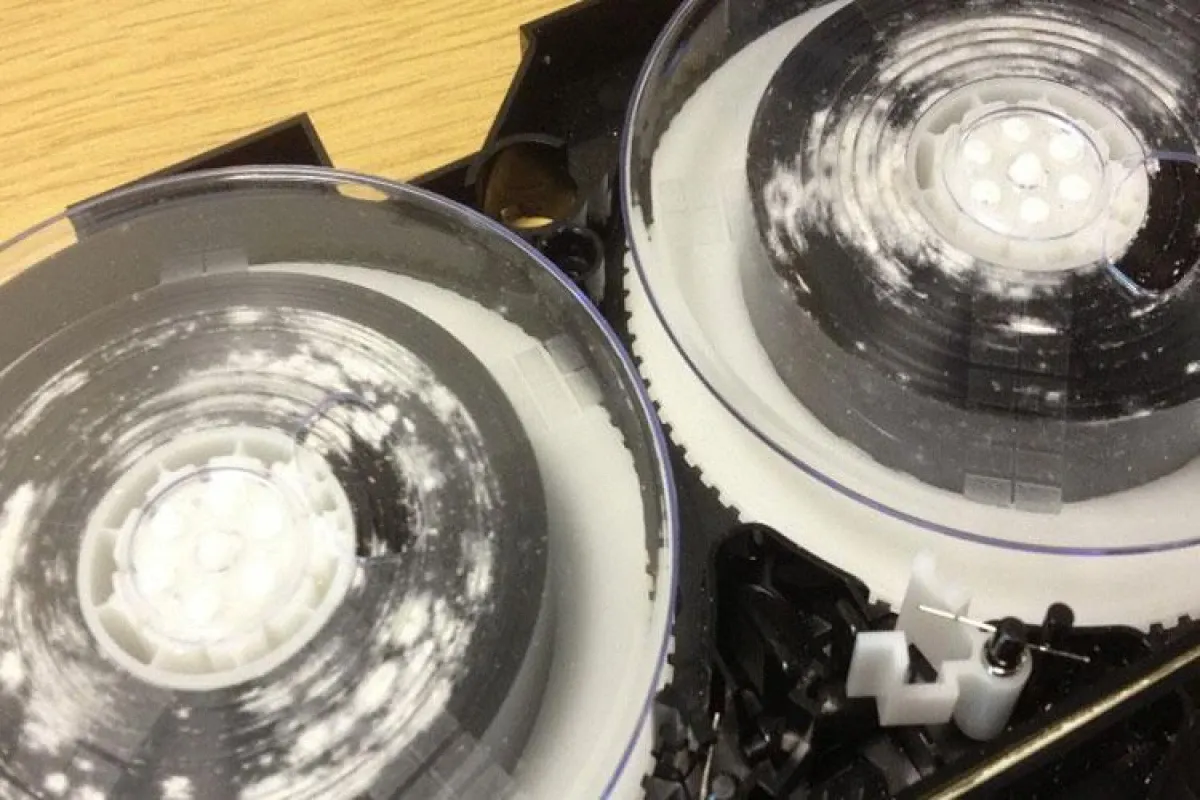
In Hong Kong this is the damage we see most. It shows as white or grey fuzz, spots or powder on the edges of the tape pack, often with a musty smell. Mould weakens the tape and, if played, smears onto the player's heads and spreads to other tapes.
Water damage
A leak, a flooded storeroom or a typhoon can soak a box of tapes. Wet tape sticks to itself and can tear when unwound.
Weak or lost signal
Strong magnets, such as those in old speakers, can weaken a recording, and all tape slowly fades with age. No repair can bring back signal that is truly gone, which is why early transfer matters.
What is reasonable to try yourself
If the footage is replaceable, or you are comfortable with fiddly work, two jobs are within reach of a careful beginner: moving a tape into a new shell, and splicing a clean break. Anything involving mould, water or badly crumpled tape is a job for a professional, because handling can strip the recording off the tape for good.
What you need
A small Phillips screwdriver
Clean, dry hands or lint-free cotton gloves
Proper video splicing tape (not office sticky tape, whose adhesive oozes and gums up the player's heads)
Clean scissors that have never been near a magnet
A donor cassette with an intact shell, if the case is broken
A clear, dust-free table in a dry, air-conditioned room
Opening the cassette
Lay the tape label-side up and remove the screws on the underside, usually five.
Hold the halves together, turn the cassette over and lift the top half away slowly. Note how the tape runs around the guide posts; a quick phone photo helps.
The spools are locked by a small brake. Press the release on the underside if you need to turn or lift them. Lift both spools together so the tape between them stays slack but untwisted.
Splicing a clean break
Trim away only the frayed or crinkled ends. At normal speed, a VHS tape runs past the heads at a little over 2 cm per second on PAL recordings, so every centimetre you cut is roughly half a second of video.
Line the two ends up so they butt against each other with no gap, no overlap and no twist.
Lay a short piece of splicing tape across the join on the back (non-recording) side and press it flat. Trim any overhang along the edges so it can't catch in the player.
Wind the slack back onto the spools by hand, gently, until the tape is snug but not tight.
A detached leader is handled the same way: rejoin the leader to the end of the magnetic tape with splicing tape, then wind back.
Closing and testing
Seat the spools, check the tape runs around the guides as in your photo, replace the top half and the screws. Before trying your treasured tape, play a tape you don't care about to make sure the player itself is working. Then run the repaired tape and watch closely; stop at the first sign of trouble.
Be realistic about the risks: a splice can still jam, a weak tape can snap again near the repair, and a player in poor condition can undo all your work in seconds.
What not to do
Don't play, rewind or fast-forward a tape with visible mould.
Don't dry a wet tape with a hairdryer or in the sun; heat distorts tape and shells.
Don't wipe mould off with water, alcohol or household cleaners. The recording layer is fragile and easily damaged.
Don't use household glue or office tape on the magnetic tape.
Don't store repaired tapes flat in a damp cupboard; keep them upright somewhere dry, ideally with a dehumidifier or in a dry cabinet.
How Capture HK handles damaged tapes
A mouldy tape should be cleaned before it goes near a playback deck, and we offer three levels depending on how bad the growth is: light cleaning HK$100, deep cleaning HK$200 and extra-deep cleaning HK$400 per tape. Tape fixing is HK$200 per tape. If you're unsure what a tape needs, send a photo on WhatsApp to +852 2882 8707 and we'll take a look before you commit to anything.
Once a tape is fit to play, we transfer it on calibrated decks with time-base correction and deliver the video as MP4. VHS transfers are HK$200 per tape in SD or HK$300 in Full HD, whatever the length.
Save the footage, not just the tape
Repairing a tape buys time, but every play wears it a little more. The surest way to keep a damaged home video is to fix it once and copy it. Find out more on our video digitisation page, or get a free quote for your tapes.
Loading...